Making an ecommerce site used to be hard but now its made easy with the worlds largest web host.
Recently my Mom decided she would like a website store to sell her SMC merchandise and some other products. The SMC company offered to sell her a site thru another co., but they don’t offer that much control and charge way to much both for the initial site design and the monthly fee (I personally think it’s a rip-off). So I decided to make her a site using my favorite host 1&1.
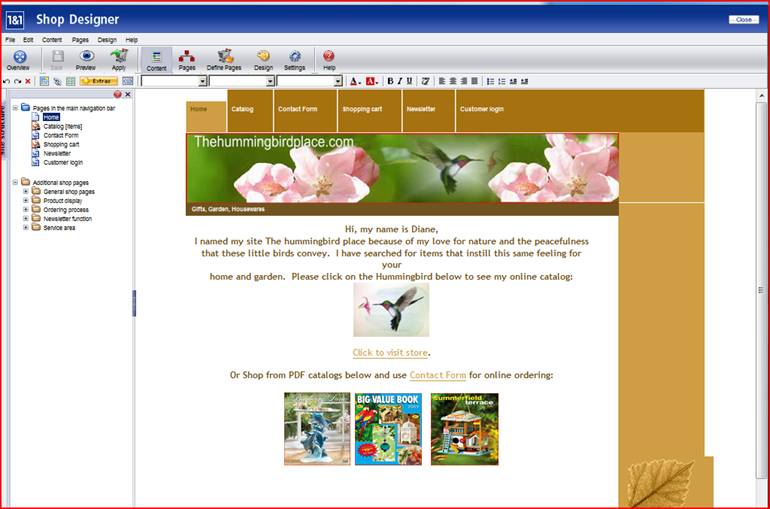
I Got an ecommerce plan for 4.99 per month for 6 months and then 9.99 per month after the introductory price. With no setup fees and good customer service I think it’s the best deal available. Here is her completed site so you can see what is possible using their easy interface. I did not do any html editing and it came out fine. You may click on it to visit her site and even buy something if you like :).
1&1’s estore site builder has a lot of advantages:
1) This site is built using an easy interface of what you see is what you get (WYSIWYG), so no HTML knowledge is really required (although it does allow you to insert html if desired).
2) It has a store front interface to facilitate adding merchandise in nested categories.
3) The store front interface allows checking on orders, emails you when an order is made and sends automatic confirmation emails to customers.
4) It allows PayPal or a credit card processor in a integrated shopping cart.
5) The shipping calculator is by weight, total items, or zone pricing.
6) It will do tax calculations.
So I think when the world’s largest web site host makes it easy for a consumer to make a site with all these features and then makes it inexpensive it truly is a great deal.
So how to build:
To start 1&1 helps you select an available domain name. .com’s are the favorite and its best to keep trying until you find one you like. Once purchased you log in to your account on 1&1 and go to domains (You will have just one) look lower and under applications you will see eshop. Click and enter eshop. This is where you will design and set up your site.
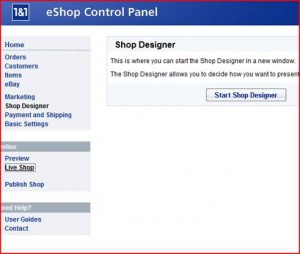
This is the first screen you see and after purchase you can log straight to this screen with a link. The daily tools (checking orders,Customers…) are towards the top and the design tools are lower. Start by going to shop designer. Later you will return to this screen to publish site.

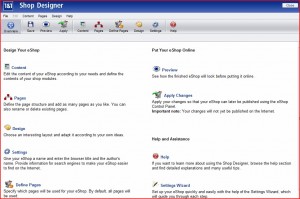
This is the shop designer it has a design button to click on that goes to a templete selection.

Now choose a templete you like. To alter the banner I clicked on the main image banner change button. You can choose A few variations or upload a custom one. Since I wanted a more custom banner I used Microsoft window’s sniping tool to copy one of the banners and altered it in a photo editor and when I was finished I re-uploaded the image in the custom image dialog. This allowed me to insert the hummingbird and the Site name in the banner.

The next screen is the main page design screen. Go to pages (see top of next image) chose one and edit it you can put text, images, links, or modules. After I put in text I added images. Then I made the images links to uploaded files (as in the PDF’s) or just a link to another page. Also enter settings info this is where you enter the browser title and some search engine data.

You will also have to define some extra pages you might need and edit those.

The next step is to save changes and then apply changes, leave designer and publish the site (3 steps that confused me for a while). I like to publish as I go but if you don’t want people to make orders yet publish later or type under construction please do not use store and don’t make a way to pay until you feel it’s ready.
You now have to add items and configure payment choices and shipping options. In manage items I made categories and added items to them. In the new item dialog it allows image uploads and makes a high quality and low quality setting. For more image detail and has a short intro and detail info to create a very complete description. If shipping is by weight insert a weight. After any change you need to republish site and if you made changes to design you need to save and apply those changes first.
The Shipping calculator lets you choose zones or zip codes or by dollar amount and has many options.

Payment options are many and include Kredit Karte Merchant Services the world’s largest credit card processor and PayPal which is simpler to set up.
Over all The configurator is very easy to use and while a custom site might have a bigger wow factor this was not bad for a days work (or two or three…). In any case 1&1 can later change your site to a standard site when you get rich and want to hire a web designer (i’s always best to own your own domain so the web designer doesn’t hold it hostage). My Moms site is limited to 50 products and really for a true store you can order the 200 product estore but since she really doesn’t like inputting items and just wanted the PDF catalogs, the 50 items fills her needs.
Hope this info helps here is the link to 1&1 and their current sale on ecommerce sites. Please use it as it gives me credit and make a comment if you need help.


Comments